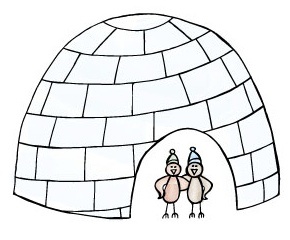
How to Build an Igloo, as Explained by an Arctic Explorer
When it comes to building an igloo, Dr. Norbert Yankielun literally wrote the book. But while How to Build an Igloo and Other Winter Shelters is a worthy wintertime read, we wanted to check in with the man himself. After all, it’s not every day you get to sit down with an Arctic explorer and engineering professor—especially one who hosts an annual igloo-building workshop at Montshire Museum of Science in Norwich, Vermont.
Dr. Yankielun was kind enough to explain how to build an igloo in 10 fundamental steps. Before diving in, it’s worth noting that these pertain specifically to the lower 48 states. In harsh Arctic climates, the snow—and thus the building process—is slightly different.
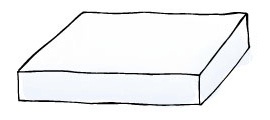
Step 1: Make a Sheet Cake
The first step, according to Dr. Yankielun, is simple: “Go out and shovel a pile of snow.” He calls this a “sheet cake,” seeing as how it’s roughly a 12’x12’ square that’s about 1.5-feet thick. “Snow-shoe on it to pack it, then shovel some more. Let it sit for a few hours or overnight.”
Step 2: Make a Snow Angel
“The next thing I do is size the igloo,” Dr. Yankielun says. “I’m teaching people to build one that’s about the size of a two-person dome tent, so I’ll have a person lay down on the ground and make a snow angel.” Plan to build an igloo big enough for this snow angel to fit comfortably inside.
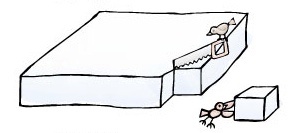
Step 3: Cut Your Blocks
After you’ve determined your diameter, “flatten the snow in that area, then cut blocks from that sheet cake.” The most useful cutting tool is a carpenter’s saw, but make sure it’s one you aren’t too fond of. “Once you use that type of saw in the snow, you don’t take it back and try to do fine carpentry work.”
As far as how big the blocks should be, “make [them] as big as you can manage.” That’s because the bigger the blocks, the fewer seams in the igloo. And the fewer seams in the igloo, “the stronger your structure will be.” Dr. Yankielun advises starting off with six or so.
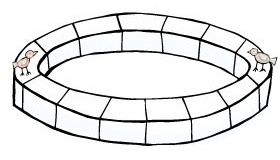
Step 4: Form a Circle
Now comes the actual building. First, “lay [the blocks] in a circle around the perimeter of the snow angel.” Once they’re all in place, trim them down so they fit snugly shoulder-to-shoulder. Before continuing, Dr. Yankielun advises placing a stick or a ski pole in the center of the ring to serve as a guidepost.
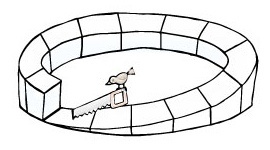
Step 5: Start a Ramp
“Now, you’re going to hate me,” Dr. Yankielun says, “but I’m going to make you cut away about a third of those blocks.” This is in order to make a circular ramp. At one point of your circle, there should be a block that stays at its original height. Choose that block, then cut the one next to it completely to the ground.
From there, go roughly a third of the way around the igloo, angling it up as you go. Once you’re done, taper the blocks so that their tops are angled inward slightly. “If you look at the top of the block and drew a line,” explains Dr. Yankielun, “that line should intersect with the base of that stick we stuck in the center.”

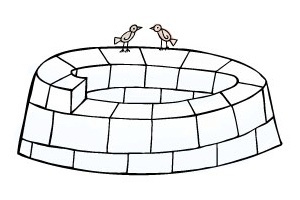
Step 6: Spiral the Ramp
Now that the tops of the blocks are angled inward slightly, it’s time to start spiraling the ramp upward. “Start again with all the same-sized blocks,” Dr. Yankielun advises. “Every time you put a block on, carve the top of the block so it points [downward] to the place where that stick is in the ground.” The angle should get steeper every time you go around, until you get to the top. Tapering is essential, as otherwise you’ll simply end up with a tube.
Dr. Yankielun also offers a bonus tip: “Try to put the blocks in so that none of the seams align. If you look at a brick wall, each brick sits halfway over top of the two bricks below it.”
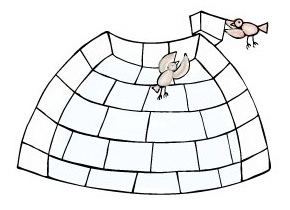
Step 7: Crown the Igloo
The final block of an igloo is fittingly called the “king” block. “When you get the wall one or two times around, get a strong adult to stand inside and help support the blocks while, on the outside, you cut them and stack them.” When you finally insert the king block, it should plug the top of the igloo. Your dome is now finished.
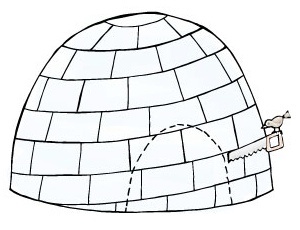
Step 8: Carve Out a Door
Of course, a dome is no good if you can’t get inside or out. The good news is that we’re now in the homestretch. Pick a spot on the side of the igloo, then “cut away half of the blocks underneath the king block in an arc shape.”
After that, you’re just about done. “There will be little cracks and crevices where the blocks didn’t quite completely align, so pack those in with loose snow.” You’ll also want to cut a small, fist-sized hole in one of the top corners of the igloo. This will provide some necessary ventilation.
Step 9: Don’t Start Any Fires
Thinking of starting a fire inside your igloo? For the sake of all your hard work, don’t. “If you’re a full-sized adult, you’re throwing off about as much heat as a 100-watt light bulb,” Dr. Yankielun explains. “The igloo walls act as insulation—you can get above freezing inside of an igloo even if it’s sub-zero outside.”
Step 10: Drink Cocoa. Enjoy Igloo.
Although Dr. Yankielun warns against any kind of fires or heating devices, there’s one source of warmth he does encourage: cocoa. “At the end of the day, you’ll sit around inside with a cup of hot cocoa and say, ‘Man, we did this.’”
Illustrations: Jess Duff, Groupon.

Read about other ways to enjoy winter:
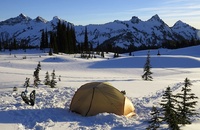
An Eagle Scout’s 10 Tips for Camping in the Snow
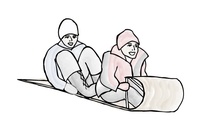
All the Types of Sleds and Tubes, Ranked
Deals in columbus

Deals in columbus Other Deals in columbus